

I’m often asked about my editing process when it comes to my images, and in a recent Instagram poll, lots of you said this is something you'd like to see from me, so today I thought I'd share with you just that! Now, just a word of warning, I'm not a photographer or professional editor, these are simply my go-to tricks for editing my images for Instagram and here on my blog. It's simple, quick and works for me!
I love a very minimal edit, but I also love having my staple app presets and ideas to use when it comes to editing. I'm a phone editor, you see, (photoshop experts look away now haha), and pretty much always have been. Since my images are mostly seen via phone, I like to use apps to create my desired effect, so that I know exactly how it will perceived when it comes to sharing them online.
The process of editing for me is super fun. I love watching an image transform, and playing around with different tones and exposures. It's like seeing my work come to life in the matter of minutes and that's really exciting for me.
To start with I'll take you through the image capturing process.
Most of the time these days I shoot the majority of my content on my camera, the Canon 6D Mark ii. It's the best investment I've made since doing this job and I couldn't be happier with the kind of content it's able to produce in comparison to previous cameras I've used. Saying that though, you don't need an amazing camera to create an amazing image. Sometimes I shoot simply from my phone, the Google Pixel 4XL, and can still capture an equally wonderful image.
Lighting is a key factor in the process however. For me, I love natural light. I have a big bedroom window and love to shoot a lot of my content inside, so this has been the situation I've worked with from day one. I love the way natural light works with my editing process, especially when it comes to self-portraits. I don't like my images to look too harsh and much prefer a softer, natural vibe.
Framing is super important to me when capturing an image. Depending on the focal point of the image I like to shoot from different angles and different depths. A wider angle is great for outfit photos and flatlays. I like to be able to crop into an image and allow room for different details. I like a wider frame too when it comes to posting on Instagram, to ensure things aren't cut out from the 4:5 image crop. I prefer a more close-up shot when I'm shooting jewellery details and beauty-portraits. I like to be able to capture finer details like eyelashes, freckles and make up or intricate designs when it comes to jewellery.
I self-shoot the majority of my work, meaning a tripod and remote can come in super handy when shooting my self-portraits and outfit images. Most of the time I'll use a timer on my Canon and focus the camera on my hand or have my mum stand in before shooting to ensure the focus is correct, whilst, when it comes to shooting on my phone, using a blue-tooth remote makes photographing alone much easier.

Onto the good stuff now, the editing process.
I have several go-to apps for editing, a few of which make my images what they are with their amazing filters and presets, but it all comes down to doing those little tweaks and perfecting what works well for you and your images too.
VSCO
VSCO is a long time favourite app of mine. Does anyone remember the days where we actually used to plan our Instagram feeds on there? Wild! Previously, I would solely edit via this app and often still do for quick story snaps and things.
The beauty of this app is that it is so easy to use. There's so many filter options to choose from and it's great for adjusting things like the exposure of an image or the clarity. It's amazing for editing more than one image in one go too, as you're able to copy and paste edits really easily. My go-to on here is the A6 preset. It's adds a really nice soft, warm tone to an image whilst also adding in a really nice contrast, perfect for self portraits.
I also love this app for adjusting the crop or frame of an image. I love using the 'skew' option to adjust any off-centre images and ensure they're straight and there's the option to crop to 4:5 on here too, which is great for Instagram images.
I usually begin by adding this filter (A6 +6.0) before moving onto the next app, Tezza!
Tezza
I absolutely adore Tezza. I love the presets it offers and again, it's so easy to use. I'll often head straight to Tezza for editing as adding one of the presets on this app really transforms an image and I think that's amazing if you're looking for a quick edit! It's great for copying and pasting edits too!
INSPR is my go-to preset on Tezza. It's great for creating a soft and creamy look, whilst also keeping with the neutral tones that I love to have in my images. I'll usually adjust the exposure and tweak the HSL in here too, to get the correct tones.
I will normally add Tezza filter INSPR (+20) on top of VSCO filter (A6 +6.0) to create my desired preset.
Lightroom
If you're not one for presets but simply want something to tweak things like temperature and clarity in an image, Lightroom is amazing. I love using Lightroom to create more clarity in my images by increasing the noise reduction and adding sharpness, as well as adjusting the tones and temperature.
It has the option to correct the optics of an image, which is perfect if you're image hasn't come out quite right. You can enter which camera you use and it'll adjust the image accordingly - the lens corrections can be a life saver!
Snapseed
Whether it's a spot that my concealer wouldn't cover or an annoying thing in the background that I'm just not vibing with, Snapseed is here to save the day!
I love Snapseed's healing tool to erase any unwanted details. It can sometimes take a few tries to get it right if it's really obstructing the image, but is totally worth it for the outcome (I'm sure photoshop users have a much easier way though haha).
I also really love the selective feature, which allows you focus in on certain areas of the image and adjust things like the saturation and structure. I always tend to reduce the structure in the background of my images for a softer look and de-saturate any unwanted bold colours!
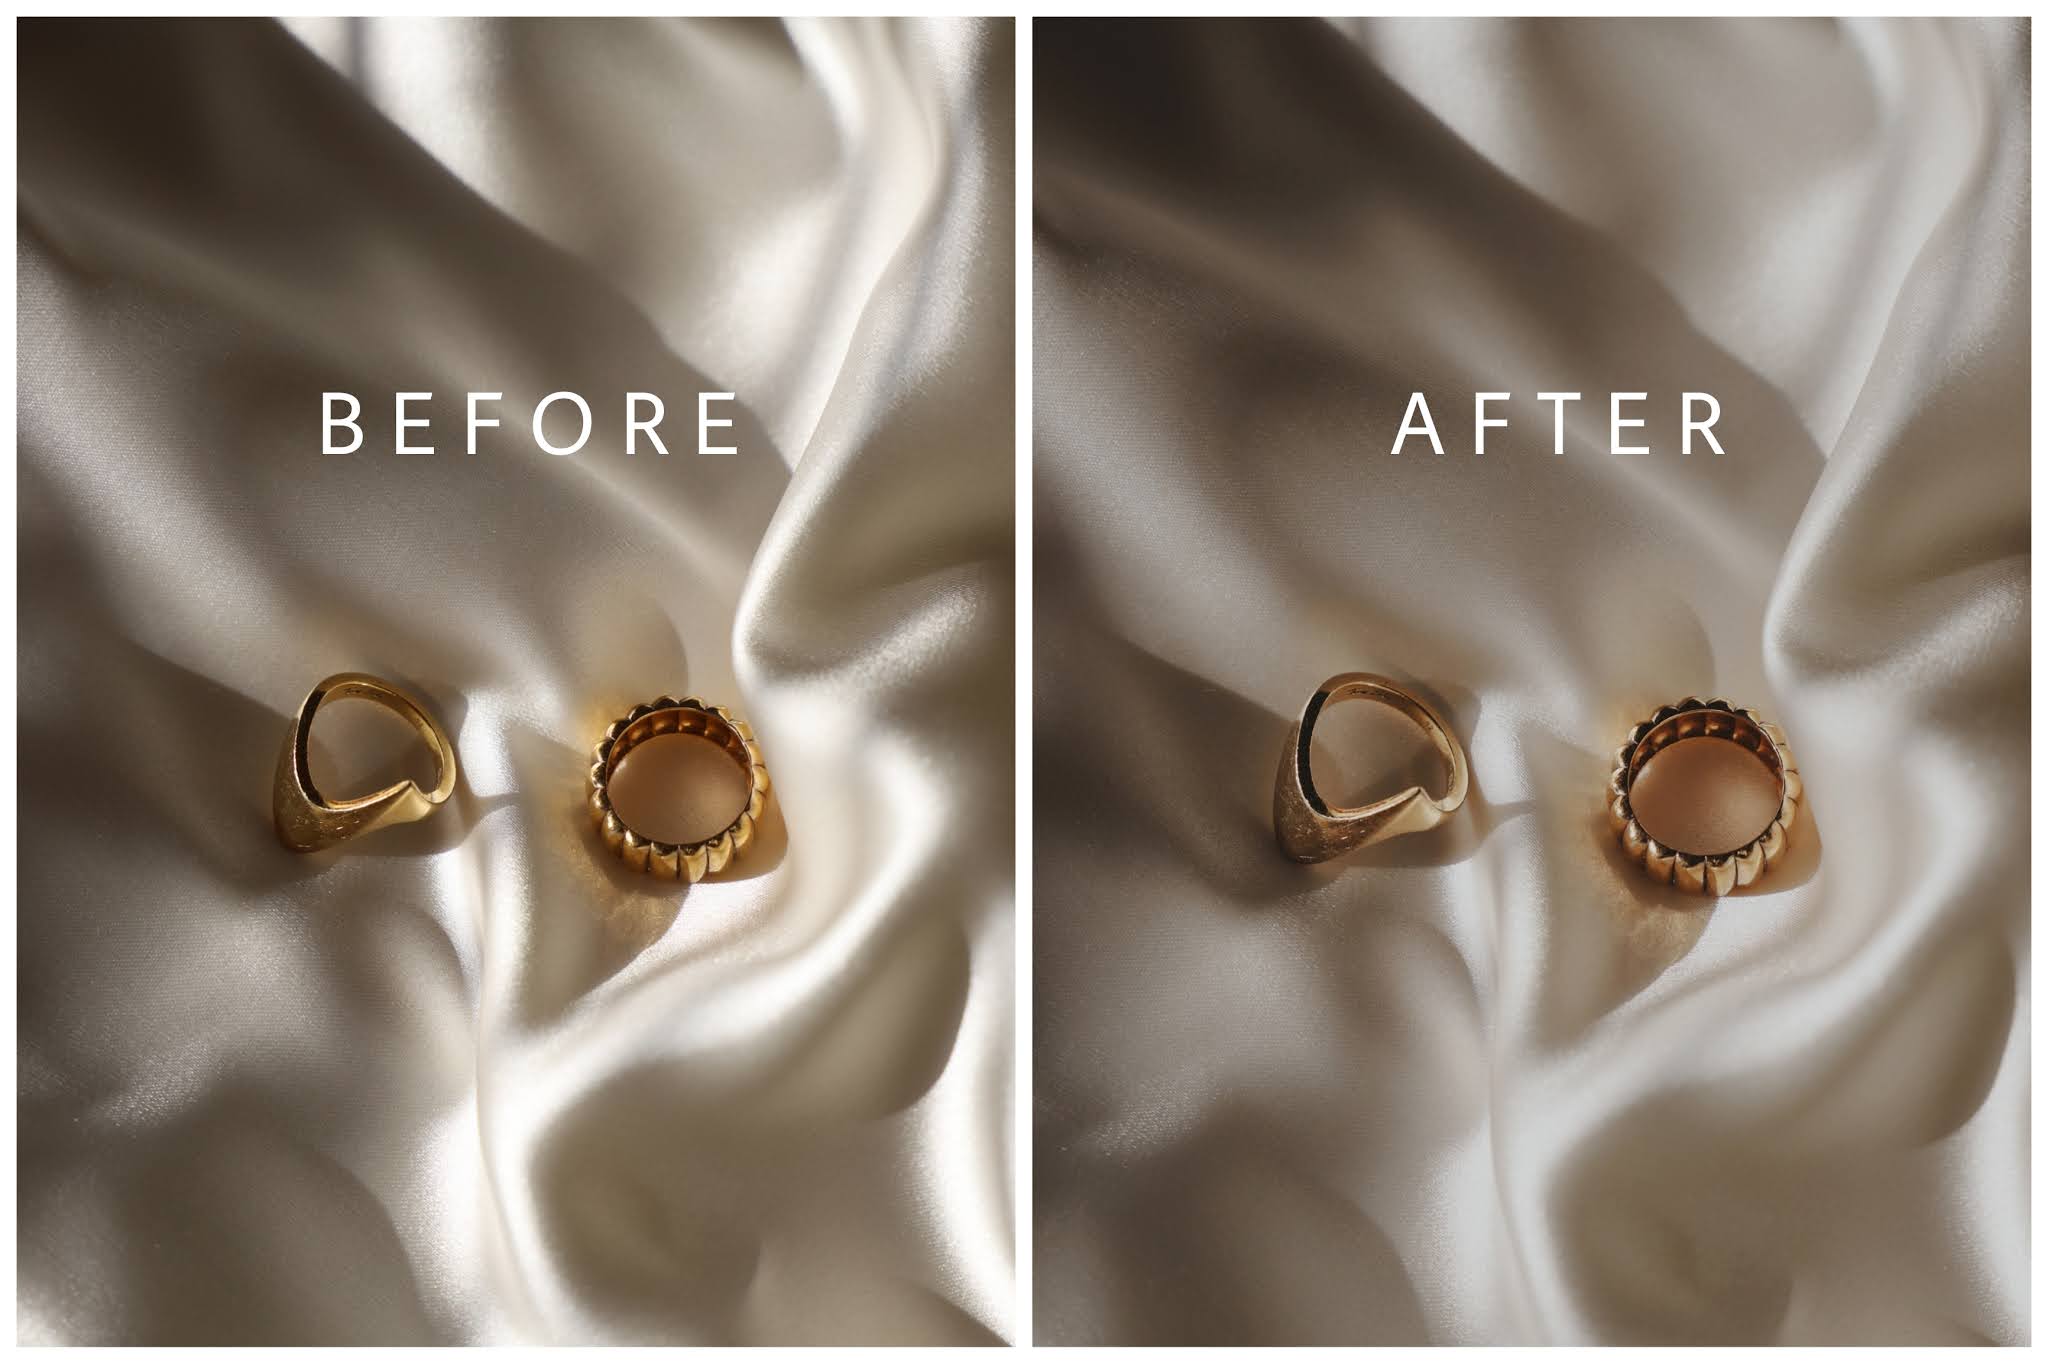
With the photo above, I actually really liked the original un-edited image, but the tones didn't quite work with the rest of my images and, especially when posting to Instagram, I like my images to feel and look cohesive. I really love the softer look the 'After' image has and the way the backdrop looks a little less harsh in comparison to the original.
Edits: VSCO Filter A6 +6.0, Tezza Filter INSPR +20, Exposure +5, Contrast -10, Orange HSL Hue +0.2, Cropped to 4:5
I think image editing is such a personal process. It's about figuring out what catches your eye, what makes the image special to you or unique to you and your 'brand'. For me, I know I love neutral tones and a minimal style, but you could love bold colours and exaggerated contrast! It's all personal and I love seeing different people's editing styles.
I really hope you've enjoyed this little insight into how I edit my images anyway, and I hope you have fun experimenting and editing your own images too!
No comments
Post a Comment